Contents
Reports
The Reporting System includes over 200 reports across 17 categories for querying inventory, orders, transactions, and system settings. You can view reports on screen, print them, or download as Microsoft Excel® (.csv) files. All reports allow you to customize the selection of parameters to generate a report specific to your needs. We can also build specialized reports to suit your specific needs.
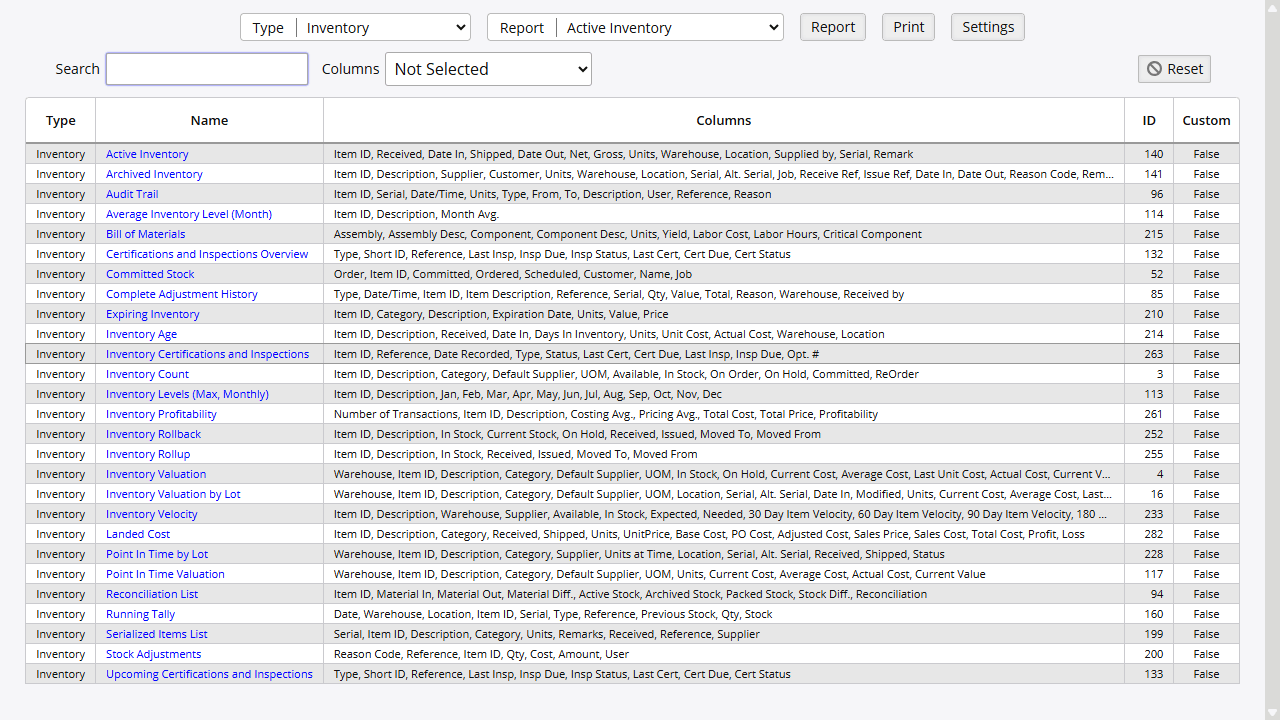
Running Reports and Queries
Reports → Reports → All Reports
To run any of the dozens of reports provided by Inventory Pro Online:
- Click on Reports and then on All Reports.
- Select a report type in the dropdown menu in the Type field and one of the available reports for that type in the dropdown menu in the Report field.
- Click on the “Report” button to access the report that you have selected.
- If you wish, you can add filters to limit the range of the report or query (see below).
- You may highlight a row of a report by double-clicking it.
- To export to a file, click on the Export link and the report will download in Microsoft Excel® compatible (.csv) format.
- Clicking on the Print link will bring up the list in a printer-friendly format with a “Print Report” button that, if clicked, will print the report.
Report Types
Reports → Settings → Report Types
Reports are grouped into a number of types for easier navigation. The Report Types page contains a list of all used and unused report types. The most common use of this page is disabling and enabling certain types of reports. To do so:
- Click on Reports and then on Report Types.
- Click on the pencil icon next to the report type that you wish to edit.
- Check or uncheck the checkbox in the Use field to enable or disable the report type, respectively.
- Click on the “Save” button.
You can also add a new report type on this page. To do so,
- Click on Reports and then on Report Types.
- Click on the “Add New Report Types” button.
- Enter a description for the report type in the Description field.
- Check the checkbox in the Use field to enable the new report type to be used.
- Click on the “Save” button.
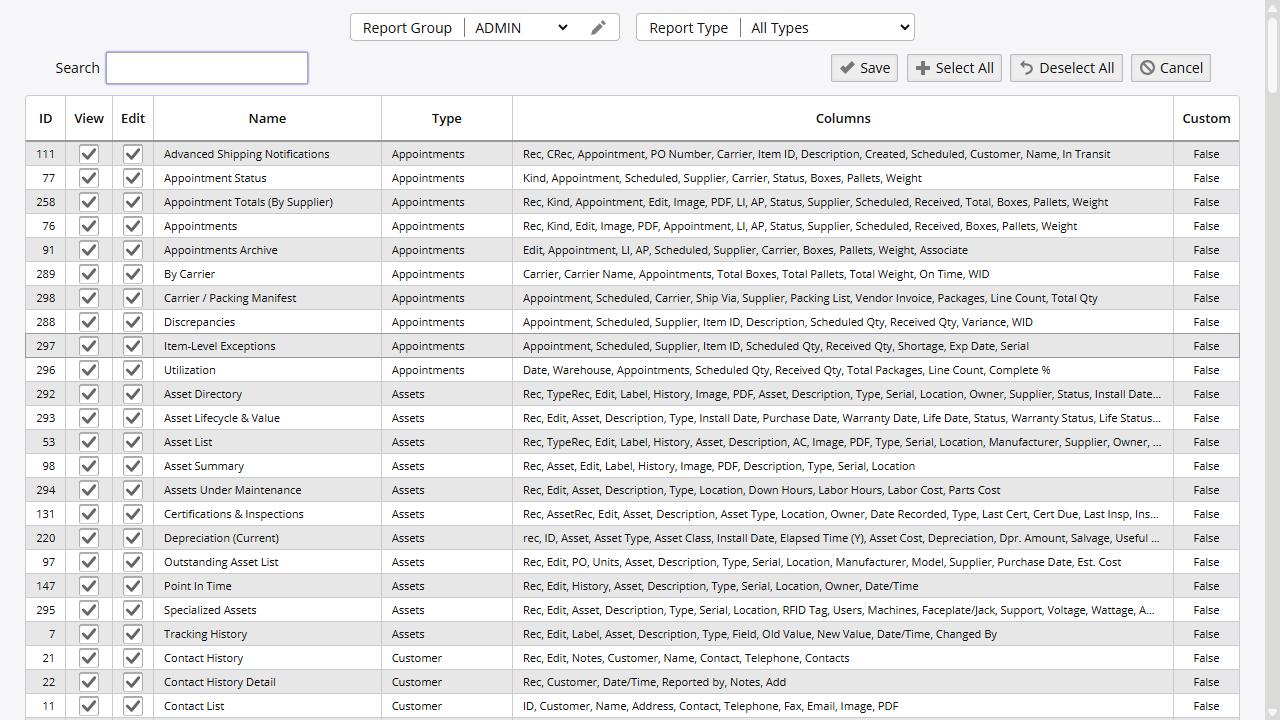
Editing and Creating New Reports
Reports → Reports → Report Definitions → “Add New Reports” Button
Reports → Reports → Report Definitions → Pencil Icon in Edit Column
This is not a feature that most users will ever use or need to use. Mistakes in adding or especially in editing reports can easily lead to serious issues with the reporting system. Therefore do not add new reports or edit existing ones unless you are absolutely certain that you are skilled enough with Inventory Pro and SQL to do so and that there is no other good solution to the problem you are facing other than adding new reports or editing existing ones. If you must use an altered version of an existing report, users are strongly cautioned against editing existing reports; instead, it is almost always better to copy the existing report into a new report and create a modified report under a new name. This will help to mitigate errors in the event that something goes wrong with the report modifications.
Reports are defined in SQL and directly interface with the database to pull the relevant data. Only select type statements can be used in the SQL. To create a report, click on the “Add New Reports” button at the top of the screen or on the “Add New” button on another report record. You can also click on the “Copy to New” button in an existing report record to copy that report’s data into a new report. New reports can be added and existing reports can be modified from the Report Definitions page available to administrators or those with the proper permissions on every report.
From there you will be taken to a new screen where you can fill out the basic fields to get started, such as Report Type, Name, Use This Report, and Is Custom. Most of the other fields are not meant for editing by a user. They will be automatically populated once the SQL query is written and entered into the Report SQL box. Note that any custom reports should be marked as such or they may be overwritten during any update sequences.
The columns field can be used to determine which columns are to be displayed. A value of 100 is automatic column width, 3 or lower is assumed to be an icon, and 0 is not to be displayed. Any other value is treated as a width in percent to display the column at the same index as on the SQL Query. The system assume a 100 if no value is provided.
The URL Links field can be used to define a link to another page. The format is [ColumnName],[Link]; without brackets. Placing values in the links can be done by placing “|ColumnName|” in the link without quotes.
Pretty much all other fields, such as AR Class, Order By, Filters, and Subtotal, are automatically generated or should not be touched.
Also in the SQL, special values can be used to reference the current user’s session. Some of these values will automatically trigger a form input to appear on the screen for that value.
| Special Value | Description |
|---|---|
!WID! | Warehouse ID |
!CID! | Customer ID |
!VID! | Vendor ID |
!EID! | Employee ID |
!UID! | User ID |
!GID! | Group ID |
!DATE! | Date Input |
Core Reporting Modules
- Inventory Valuation - Track inventory value and costs
- Order Processing - Monitor order fulfillment metrics
Core Reports
Landed Cost
Reports -> Inventory -> Landed Cost
The Landed Cost report provides detailed landed cost calculation information for each shipment and its profit/loss margins.
Point in Time Valuation
Reports -> Inventory -> Point in Time Valuation
The Point in Time Valuation report allows valuation calculations to be made using values from the most recent valuation date compared to value upon arrival.
Inventory Rollback
Reports -> Inventory -> Inventory Rollback
The Inventory Rollback report provides a snapshot of your inventory as of the date indicated on the report, allowing you to report accurately the value of your inventory for year-end financial and tax purposes.
Inventory Allocation
Reports -> Inventory -> Inventory Allocation
The Inventory Allocation report helps strategically track inventory levels throughout the system.
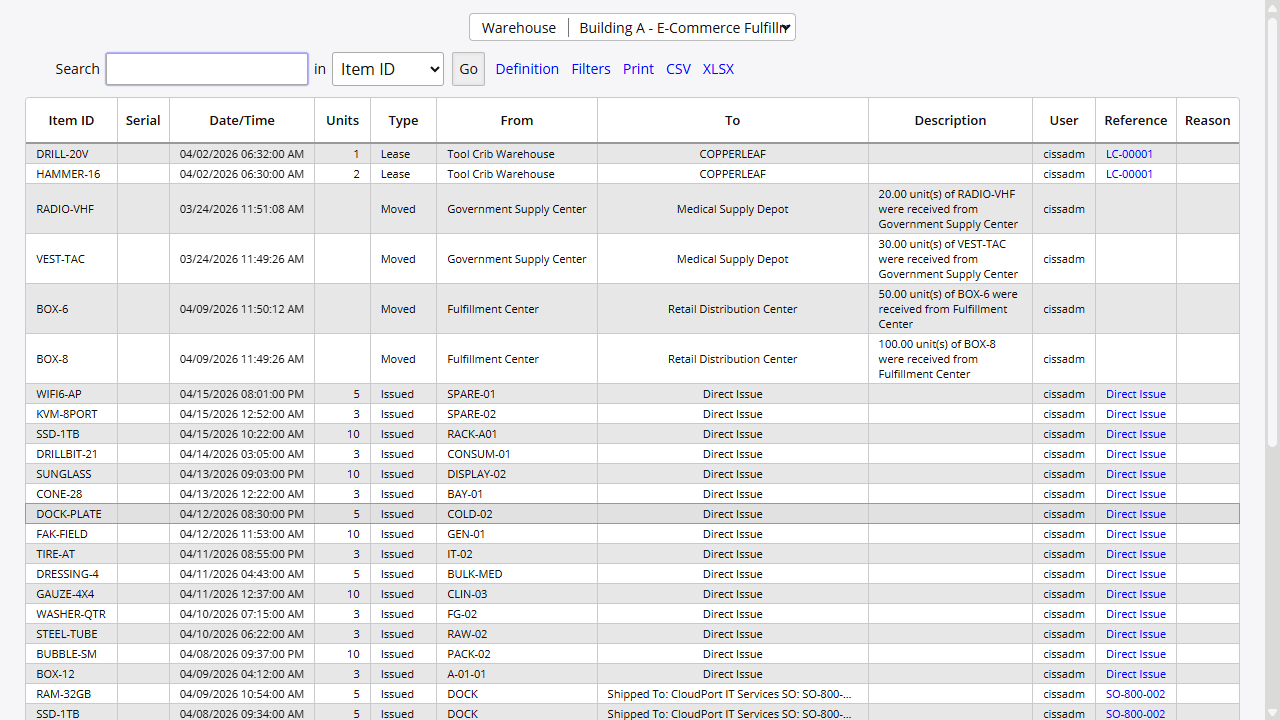
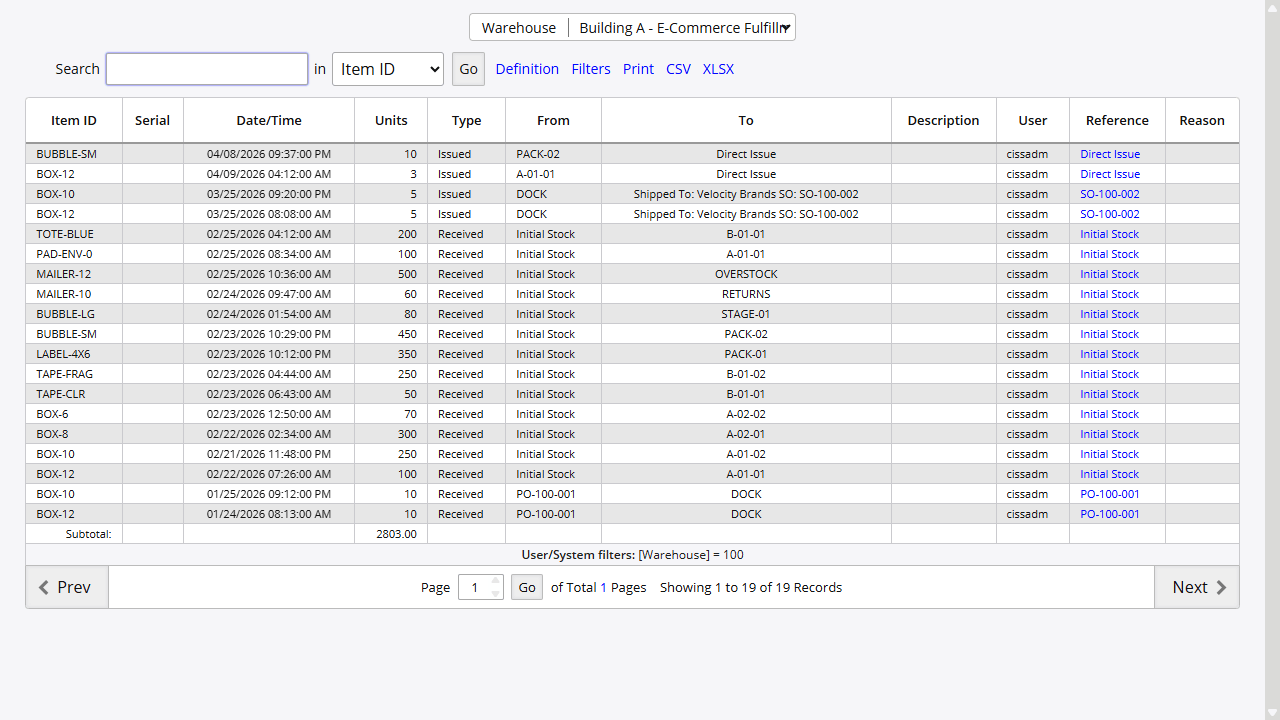
Audit Trail
Reports -> Inventory -> Audit Trail
The Audit Trail report is a date and time-stamped, a sequential record of the historic details around a transaction in the system.
Reporting Features
Searching
Each report is equipped with a search bar and a column filter in the upper left corner of the report page. This allows users to search any combination of characters and specific columns for relevant information.
Sorting


Each column allows for sorting from ascending to descending order by clicking the column header. This is indicated by an arrow that will appear on the column header.
Permissions
Inventory Pro allows for special permissions not only to different modules of the system but to the reports as well. Limit access to certain groups for different reports.
Filtering
 Along with the search bar, there are several ways to filter information on reports. All reports along with a search bar can have additional filters applied to them via the filter link located near the top of each report. Some reports also have additional lookups and date selects to filter information depending on the report.
Navigation
 Navigating around a report is done primarily through the previous and next buttons located at the bottom of each report. The page select can also be used if users know what page the information they’re looking for is located around for more populated systems.
Editing Reports
Outside of completely customized reports, Inventory Pro allows for minor edits to its reports as well. Allowing information to be hidden or shown depending on the need of each clientele. These changes are typically applied by CISS
Standard Reporting
The standard reports in Inventory Pro help navigate the typical requirements of an inventory system (Inventory Cataloging, Purchase Orders, Shipping Orders, Return Orders, Audit Trails, Users Reports, Employee Reports, Etc.)
Custom Reporting
Inventory Pro also offers custom reporting to best suit the needs of our clients outside the scope of a typical inventory system. Examples of such reports being used by live clients include metadata collection/management reporting and employee/user request form application and approval system.
On this page